Professional photos can be taken simply with your mobile phone these days, as long as the photos are sharp. So a professional camera is no longer necessary. Above all, use our tips to take the best professional photos for your ads.
What is the power of professional ad photos?
Professional ad photos help to sell your product faster. This is because they give a clear picture of what the buyer can expect. Or they create an ‘experience’. That is, the potential buyer can already see themselves driving your vehicle or working with your machine.
Tip 1 | Take at least 5 photos
With one or two photos, the buyer does not yet know what to expect. Therefore, take at least 5 photos of your vehicle, machine, or part where all the details are in the photos. The more photos you take, the better the buyer will naturally get a good idea of what you are selling. Do you want to sell a vehicle or machine? Then take photos of both sides, the front, the back, and the inside of the cab anyway. Extra professional are photos of:
- The condition of the tyres (show tread depth well in the photo)
- The dashboard/control system/mileage or running hours
- The chassis with the fifth wheel on it
- The information displayed on the vehicle/machine itself. For example, there is often a rating plate or sticker on it with information about the type, number of axles and the load capacity per axle.
- The back of the cab (for tractors)
- Detail photos of (extra) features such as a PTO, hydraulic system, truck-mounted crane, microwave oven, cooler, parking heater and stand air conditioning
For parts, you can think of photos of: both sides, the front, rear, the top and photos of the underside. For extra professionalism, take detail photos of important aspects of the part.
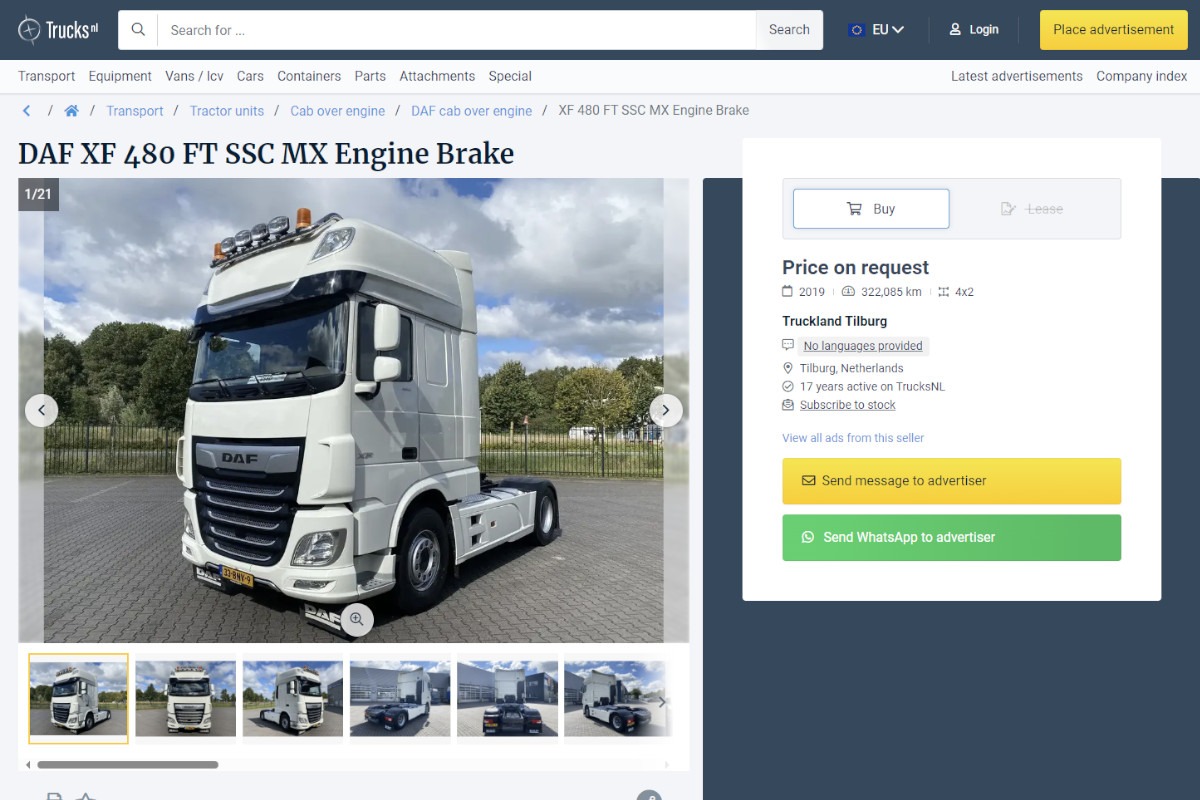
Tip 2 | Create guidelines
Set certain guidelines that your ad photos must meet. Guidelines ensure that your ad photos are photographed in the same style. This radiates professionalism and ensures recognition. For example, always photograph your vehicles and machines in the same place in front of your premises.
At a section, you can always take photos in the same space. We understand that you can have large and small parts. Then make sure you have a space that fits both types of parts. Or pick two spaces: one where you always take the photos for large parts and one where you always take the photos for small parts. Consider a well-lit room (indoors) for taking photos of small parts. And a large hall or (covered) place outside for large parts. Always make sure there is enough (natural) light in the photos. That way the product is best visible.
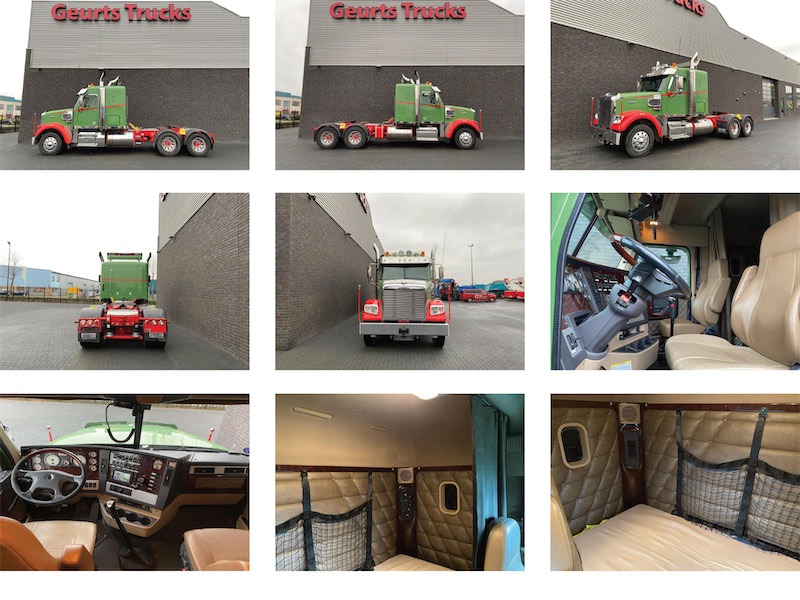
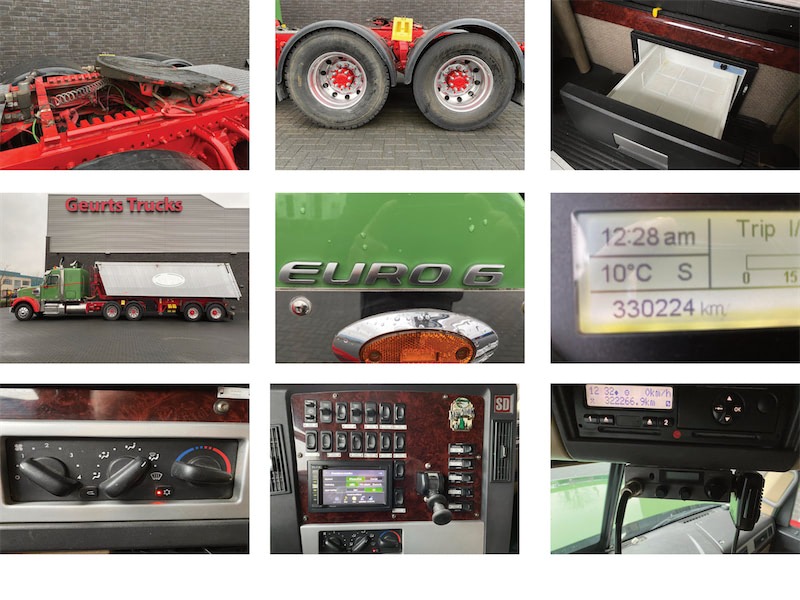
As an example, let’s take some photos of Geurts Trucks, advertiser on TrucksNL. The photos show that they maintain clear guidelines in their advertisement photos: all photos are taken in front of their premises (from set angles). Details are also photographed well.
Commendable photos:
Pictures of details:
Tip 3 | Pay attention to correct photo formats
Want to get the best display of your ad photos on sales platforms? Then take certain photo sizes into account. For the best display on TrucksNL, our advice is to position your photos horizontally and with certain width and height ratios. These proportions are also known as the ‘aspect ratio’. The best aspect ratio on TrucksNL is 3:2. This means that the best resolutions for photos on TrucksNL are (in order of quality):
- 2560 x 1700 pixels
- 2160 x 1440 pixels
- 1920 x 1280 pixels
On a professional photo camera, the aspect ratio is easy to change via the settings. On smartphones, this is sometimes a bit trickier. Smartphones usually stick to a photo format of 4:3. But 4:3 is a ratio close to 3:2. So good enough for an almost perfect photo display on TrucksNL.
The image below shows the difference between 4:3 and 3:2. The 3:2 photo format is just a little bit wider than 4:3, which you can see when the surfaces overlap.
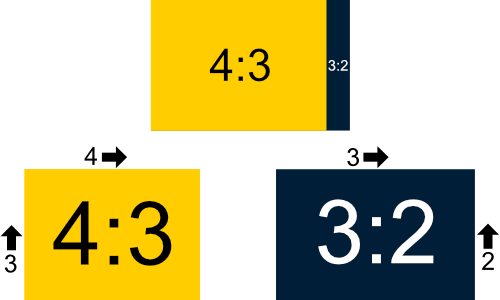
If you stick to the right sizes and aspect ratio, you will prevent your ad photos from getting blurry areas on the sides or tops.
! We understand that sometimes you might have a sprawling aerial platform, tower crane or other vehicle/machine/equipment that would be better photographed standing up. That is certainly allowed, but at least make sure the first photo is a landscape one. This is the photo you will see in the search results, after all. Our website’s statistics also show that ads whose first photo is a landscape photo receive more clicks and responses than ads that start with a portrait (vertical) photo.
Tip 4 | Make your logo visible
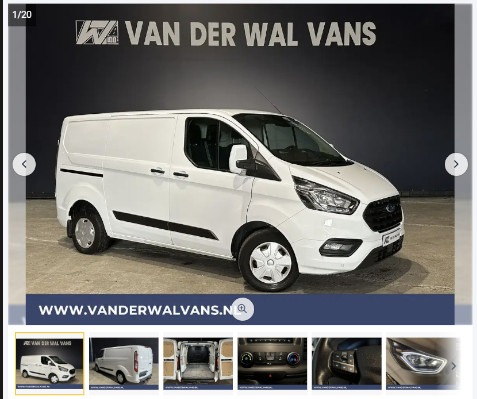
Make your logo visible in ad photos to increase brand awareness. It also prevents people from using your photos illegally. You can do this in many ways. For example, park a vehicle or machine in front of your company banner with logo. For parts, you can place your logo on a printed A4 next to it on the photo. (An ‘ordinary’ A4 might look a bit unprofessional. Our tip: put the logo neatly on a piece of sturdier paper and plasticise it).
What else you can do is add a watermark to all your ad photos in addition to your company logo. This further prevents your photos from being used unlawfully.
Tip 5 | Take honest photos
Don’t hide damage; instead, put it clearly in the photo. Give tips on how to (easily) repair the damage. If you hide damage and the buyer comes along, he will obviously not have counted on this. This could result in the sale not going ahead or him deducting from your selling price. Two things you would obviously rather avoid. Or if the buyer buys your vehicle online and then receives it with damage, this is obviously not good for your reputation. You may receive negative reviews as a result, for example.
Tip 6 | Avoid distractions
Make sure the focus is on the product you want to sell. Only this should be in the ad photo. So avoid distracting things in the photo like people and animals.
Tip 7 | Take sharp pictures
It is important to take sharp photos. With a camera, you can use a stand for this. Are you taking photos with your mobile phone? Then make sure you hold your mobile still. Sharp ad photos make it easier for potential customers to see what you are selling.
! Our website statistics have shown that blurry ad photos get fewer responses and clicks.
Tip 8 | Pay attention to the light in the pictures
It is best to take photos during the day or in a lit room. If you take photos in the evening or in a dark room, the photos will be less visible. In addition, make sure there is no backlight. This is light that shines straight into your camera, as this actually overexposes the photo, making it impossible to see anything in the picture.
Exercise especially by taking lots of photos using these tips. That way, you are sure to get professional ad photos that will ensure a quick sale!
